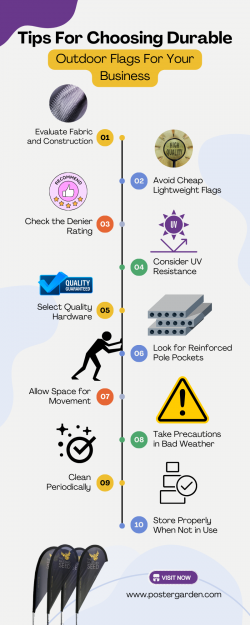
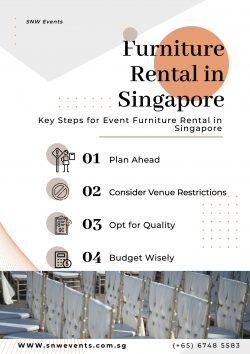
PP Bottle Overprinting Process: 4 Major Aspects
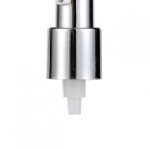
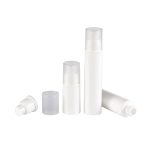
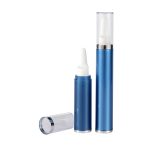
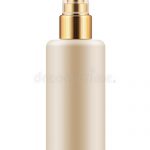
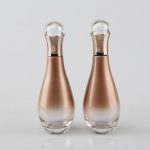
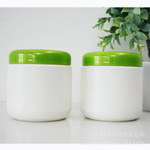
PP Bottle made of polypropylene material through injection molding process are basically outer packaging materials for light industrial products, such as cosmetic bottles, detergent bottles, drinking bottles, grease bottles and the like. These bottles are very good in weather resistance, chemical resistance and mechanical strength and are therefore commonly used in the packaging industry. The smaller bottles are made into a cylindrical shape, a conical shape, and an elliptical shape. These curved body bottles are generally printed using a domestic semi-automatic curved surface printing machine, and the overprinting color does not exceed 3 to 5 colors.
The monochrome printing of the curved body supports the substrate by four rollers, and the movement of the screen drives the substrate to rotate to complete the printing, and the plastic bottle printing cannot use this method. It is to clamp the substrate by the moving and static clamps, and through the bite process of the rack and the gear, the movement of the screen and the rotation of the substrate are rotated to complete the printing. The Plastic Bottle Manufacturer will briefly describe the process points in the PP bottle overprinting process. Https://www.ruichangpacking.com
First, all kinds of color screens need to be ruled plate making
The so-called rule plate has two aspects: the blank screens with the same number of meshes and the same tension are coincident with the same position on the printing table; the positioning cross lines on several overprint negatives are overlapped on the same position on the printing table. on.
1. Positioning of the screen version: The positioning of the screen version is relatively simple, generally using a square or three-point positioning block positioning. The positioning block needs to have a certain thickness. It can be made of 3~5mm plexiglass and fixed on the printing table with double-sided tape. If the frame does not have a 90° angle, the longest side of the frame must be placed with the positioning block or the square. Prison to ensure the flatness of printed graphics.
2. Positioning of the film: There are many methods for overlapping the film, and the following two methods can be used.
(1) Replacement method: When the first screen is finished, do not remove the film from the printing table, but place the second film on the top of the first film and make the positioning cross lines overlap. Scotch tape is fixed on one side, and then the first film is removed from the plate. The replacement method is also called the left and right side shortage positioning method, that is, the same side of the upper and lower negative films, and the size should be changed.(2) Centerline extension method: When using a computer to separate the originals, each color separation film does not use the method of overlapping the overlapping lines, and the center line positioning method, that is, the center positions of several sets of color negative films are 4 positioning short lines, short line length 5~10mm, width 0.3~0.4mm. When making the plate, place the screen printing face up on the desktop, draw the center line on the frame, then place the film on the screen, and use a ruler to connect the four short lines in the vertical and horizontal directions together. There is a misalignment, after the correction is completed, the negative film is fastened to the screen with a transparent tape, and then the screen is turned over and pressed against the three-point positioning block or the positioning square of the printing table to inhale the printing plate.
Since the curved printing machine squeegee and ink repelling knives occupy a large area of the screen (about 200mm), the screens are generally rectangular, and in the process of printing, often only 4 points in the vertical direction are connected accurately. On the four points in the horizontal direction, there are 3 points or 2 points that can be connected together (the squareness of the frame is deviated). This will ensure that the printed graphics will not be tilted.
In addition, there are two factors that cannot be underestimated in the rule-making, that is, the correct choice of mesh size and film thickness. The screen is generally made of 300-350 mesh yellow polyester mesh, the solvent-based ink is 300 mesh screen, and the photocurable ink should be 350 mesh. If there are longer lines and bar code lines in the printed graphic, it is necessary to use a 22.5~30° oblique stretch net. The smooth substrate photosensitive film can be thinner, and the matte and grain surface substrate photosensitive film should be slightly thicker to improve the ink hiding rate.
Second, the reasonable preparation of gears and positioning pin sleeves
The surface color printing is carried out by the gear and the rack biting process, which drives the substrate to rotate to complete the printing task. The rack is an inherent part of the press, and the gear is a component that changes over time depending on the size of the substrate. The optional gear should follow the following principles: the diameter of the substrate = the diameter of the gear, that is, the circumference of the gear should be consistent with the circumference of the substrate, and the tooth profile of the gear should also match the rack. Screen printing factories generally do not have the ability to make their own gears. The solution is to remove the rack and gear mounts from the press and send them to the mold factory or gear processing factory to process a gear of the right size. Since the ellipse is part of a perfect circle, when gears are equipped, it is necessary to find the center and radius of the object and then customize the gear. There are two points to note when making a positioning fixture:(1) The position of the positioning pin should match the plastic positioning groove;(2) The fixtures are generally rounded. The center of the disc is provided with a sleeve, and the sleeve is screwed with the gear holder. The circumference of the disc is also welded with a stainless steel strip to prevent the plastic bottle from being pulled out of the chuck. The height of the retaining wall is 5~10mm, and the oval plastic bottle should also be welded to the inner retaining wall. The inner retaining wall has the same curvature as the plastic bottle.
For large-open conical bottles (small taper), the tapered jet head cannot directly hold it, and the substrate cannot be rotated. At this time, a T-shaped lid can be made of metal or nylon material, the diameter of the circle in the lid is equal to the diameter of the circle in the bottle, and a gas inlet of about 20 mm is opened on the lid, so that the cone-shaped jet head can hold the bottle. And inject air into the bottle.
There are two printing methods for conical plastic bottles:(1) The screen is parallel, the table is tilted, and the rotary tangent of the bottle is always parallel to the screen plane; (2) the screen is tilted, and the doctor blade and the ink return knife are also tilted. The adjustment method is to put the bottom of the screen clamp. Attach a piece of wood that matches the taper of the bottle so that the screen can be tilted to the angle we need. At the same time, loosen the blade holder and use the horizontal screws on both sides to adjust the angle of the squeegee and the squeegee to make them and the net The version is parallel.
In addition, the contour of the conical plastic bottle on the screen is flat, so the multi-color screen must have a starting point mark to facilitate the smooth operation of each color sequence.
The rack is parallel to the ground during the squeegee process, and when the table is lowered to a standstill, the rack should be at an angle to the ground. The angle is formed by the rise or fall of the table, regardless of the rack. In what state, the nylon pressure roller on the rack should always maintain a good contact state, otherwise the overprinting may occur.
Plastic bottle printing is divided into full-circle printing and half-week printing. Cylindrical plastic bottles can be printed all week, while oval plastic bottles can only be printed in half a week.
The color printing of plastic bottles can be carried out as follows:(1) Loosen the screen positioning block fastening screw on the optical axis, screw the screen into the net folder, and move the screen sliding frame left and right to make the squeegee exceed the printed graphic 15~30mm, beyond the distance. Depending on the specific size of the printed image from the middle of the bottle, the two left and right positioning stops are finally tightened;(2) Align the bottom groove of the plastic bottle with the positioning bump in the positioning fixture to make it close to the contact, and use the support frame to make the bottle body parallel to the working platform. Rotate the bottle body so that the center of the bottle is facing upwards, become the center line of the substrate rotation, put the rack down and contact the gear, and place the rack pressure roller on the rack to loosen the fastening screw. When the pressure roller and the rack are in good contact, the screw can be tightened and the ink can be printed.
Third, the flame processor and color fastness
Plastic bottles made of polypropylene materials have low surface energy and poor affinity with inks. They are usually used for surface treatment after being processed by a flame treatment machine. The flame processor is composed of a conveyor belt, a tapered plunger, a flame nozzle and a gas tank. In use, the plastic bottle is placed on the tapered plunger, and the conveyor belt moves forward at a constant speed. Before the flame nozzle, the tapered plunger starts to rotate, and also drives the bottle to rotate, and the blue flame ablates the surface of the plastic bottle, thereby Improve the surface energy of plastic bottles and increase the adhesion to ink. The strength of the flame, the running speed of the conveyor belt, and the smoothness of the bottle rotation directly affect the treatment effect, and the smoothness of the bottle rotation is the most critical. The smoothness is proportional to the size of the bottle. The shorter the bottle, the smaller the radius and the better the effect after treatment.
For larger bottles, we must take measures to increase its smoothness. A common method is to attach a nylon sleeve to the tapered post. The inner diameter of the sleeve is also tapered, and the outer diameter is the same as the size of the bottle. The set of bottles cannot be dropped by themselves and must be removed manually.
Flame-treated plastic bottles should be printed immediately. Multi-color overprinting should be selected from photo-curing inks, and ordinary printing can use ordinary inks. Printing with ordinary ink, the color sequence interval should not exceed 6h, otherwise the surface of the plastic bottle can be reduced, it is easy to secondary dust, affecting the adhesion of the ink. For companies with smaller production units, printing in the second or third color, high-quality two-component inks can be used, and the effect is also good.
Fourth, the working procedure of plastic bottle overprinting
● Load the printing plate into the net folder, check the position, and pour the ink into the blank space of the starting point of the screen.
● Switch on the circuit, start the air compressor and switch on the press air pressure valve.
● Place the plastic bottle on the work platform support frame, and the positioning groove at the bottom of the bottle is aligned with the positioning bump in the positioning fixture.
● Press the “ICYCLE” button and the “STOP/START” button on the operation panel, the work platform rises, the substrate clamps the cylinder, the plastic bottle is clamped, and the conical jet head injects air into the plastic bottle.
● The ink returning knife rises and the squeegee falls into the screen and is in linear contact with the plastic bottle.
● The rack and the gear on the screen sliding frame are fully engaged, so that the screen moves to the left and the plastic bottle rotates. The ink is transferred to the plastic bottle under the action of the squeegee pressing force.
● The squeegee rises, the ink return knife falls, the screen moves to the right, stops at the starting point, the table falls, the clamping cylinder is released, and the plastic bottle is taken out.
In short, with the development of society and the enhancement of people’s packaging awareness, the market potential of high-quality plastic bottle materials such as PP bottles has great market potential; at the same time, it is becoming more and more refined, which requires screen printing enterprises in the production process. In order to keep up with the development of the times, we will continue to accumulate experience and improve our technical level.