3D Modeling for 3D Printing: Avoiding Common Design Mistakes
Avoiding Common Design Mistakes
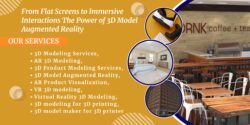
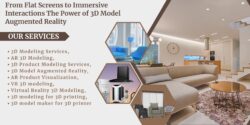
In today’s era of rapid prototyping and custom manufacturing, 3D Modeling for 3D Printing has become a cornerstone of product development, architecture, healthcare, and even fashion. While powerful 3D printers and cutting-edge 3D Modeling Services make fabrication more accessible, one small design flaw in the digital model can result in a failed print, wasted resources, and project delays.
To ensure seamless output, it’s essential to create accurate, printer-friendly models from the start.
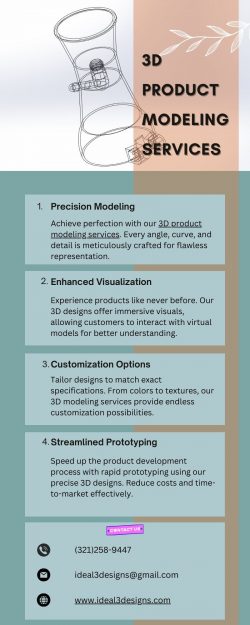
Why Precision Matters in 3D Product Modeling Services
Before diving into the design pitfalls, let’s understand why accuracy is vital in 3D product modeling services.
Whether you are building a prototype for a startup or a replacement part for a machine, the digital model becomes the blueprint for the physical product. Unlike screen-based uses such as AR Product Visualization or Virtual Reality 3D Modeling, 3D printing involves real-world material constraints such as gravity, strength, and support. A minor modeling error can cause layer shifting, warping, or structural weakness.
That’s why choosing experienced 3D Model Maker for 3D Printer and understanding key design principles are essential.
Mistakes in 3D Modeling for 3D Printing1. Ignoring Minimum Wall Thickness
One of the most frequent errors in 3D Modeling for 3D Printing is designing walls that are too thin. Each printing material has a recommended minimum wall thickness
Solution: Always check the minimum wall thickness supported by your chosen material and printer. Use wall-thickness analysis tools in your modeling software.
2. Overlooking File Format Compatibility
3D printers rely on specific file types like STL, OBJ, or 3MF. Choosing the wrong file format or incorrectly exporting your model can lead to printing errors or loss of detail.
Solution: Consult with your 3D Modeling Services provider to determine the correct file format. Make sure to check for and repair non-manifold edges, inverted normals, or overlapping faces before exporting.
3. Inadequate Support Structures
Designs with overhangs exceeding 45 degrees or intricate geometries often need support structures to print successfully. Failing to include or optimize these structures can lead to sagging, poor surface finish, or broken parts.
Solution: Use slicer software to preview and automatically generate support structures. Modify your model in advance to reduce the need for excessive supports.
4. Non-Watertight Models
Open meshes confuse the printer’s slicing software, often leading to missing layers or a corrupted print.
Solution: Run mesh integrity checks using tools like Netfabb or Meshmixer to ensure your model is solid and printable.
5. Scaling Issues
Many times, users unknowingly design models in the wrong scale or measurement units, leading to prints that are too small, too large, or dimensionally inaccurate.
Solution: Always work in millimeters unless otherwise required. Cross-check dimensions in your modeling software and slicer before exporting for print.
6. Overcomplicating Geometry
While it’s tempting to design complex features, excessive detail can result in jagged or broken prints, especially on low-resolution printers.
Solution: Simplify your geometry without compromising functionality. Use 3D product modeling services that specialize in optimizing high-poly models for printability.
Leveraging AR and VR AR 3D Modeling for Prototyping
AR 3D Modeling isn’t just for games and marketing—it can also be an invaluable tool during the design phase of 3D printed products. Visualizing your model in real-world environments helps spot scale issues and ergonomic flaws before printing.
Example: Imagine placing your 3D model of a chair into a living room scene via AR Product Visualization to check for spatial fit and aesthetics.
VR 3D Modeling for Immersive Editing
Using VR 3D Modeling software like Gravity Sketch or Oculus Medium allows designers to sculpt, view, and manipulate models in a virtual 3D space. This can significantly improve accuracy and creativity during the design phase, especially for organic forms.
Bonus: With Virtual Reality 3D Modeling, teams can collaboratively review complex geometries before investing in physical production.
How 3D Model Augmented Reality Enhances Client Approval
When clients can’t physically interact with prototypes, 3D Model Augmented Reality bridges the gap. Instead of sending multiple iterations through print, use AR to present the model in context. This shortens approval cycles and reduces rework.
Tips for Effective 3D Modeling for Printing
- Start with the End in Mind:
Understand what the final product should do and where it will be used.
- Know Your Printer and Material:
Different machines and materials have different tolerances.
- Design for Assembly:
For larger prints, break your model into parts that fit within printer constraints and are easy to assemble.
- Use Boolean Operations Sparingly:
Boolean unions and subtractions can cause mesh errors—double-check for non-manifold edges.
- Iterate with Prototypes:
Start with scaled-down or low-resolution prints to catch issues early.
Final Thoughts
3D Modeling for 3D Printing is a nuanced process that goes beyond just beautiful design—it’s about functionality, manufacturability, and real-world performance. By avoiding common mistakes like ignoring wall thickness, forgetting support structures, or exporting incorrect file types, you save valuable time and resources.
Whether you’re a designer, manufacturer, or business owner, investing in reliable 3D Modeling Services and expert 3D product modeling services ensures that your printed models are not just prototypes, but powerful, functional innovations.