Review of the new laser engraver
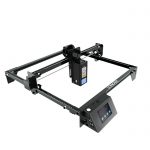
Atomstack contacted me to ask if I would be interested in reviewing their new flagship Atomstack A10 Pro desktop laser engraver. I said yes, just thought the A5 Pro would have some basic upgrades, but I was wrong. The A10 Pro initially had the same footprint and axle structure as the A5 Pro, but the similarities end there.
PackageThe device arrived very well packaged. All parts and accessories are neatly tucked into a foam shell with double-stacked components such as side rails separated by extra foam. Also found are desiccant packs and extra sturdy corner protectors, adding to an already solid package.
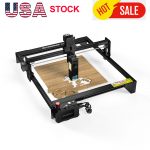
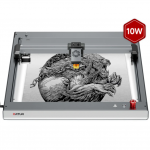
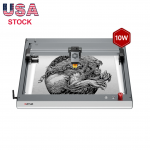
AssemblyAssembly is very easy and all needed tools are included. It took me about 30 minutes to fully assemble the unit, only because I did something wrong the first time. The X-axis comes pre-assembled, so you only need to assemble the front, rear and side rails with a total of 16 small bolts attached to the feet. The front left foot is actually a new controller (nice touch) with a magnetically attached touchscreen display. Like its younger brother, the A5 Pro model, the A10 Pro fits perfectly in an area of 26x26x12 inches (660x660x304mm), not including any exhaust enclosures. The footprint is expandable, allowing you to double the work area with an upgrade kit. The assembly guide is very easy to follow.
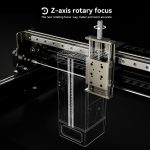
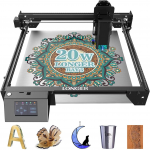
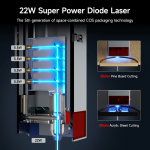
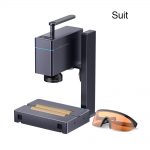
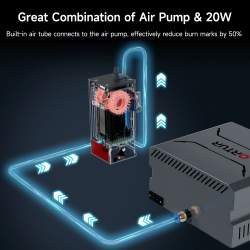
Some notable new featuresThe A10 Pro has some really interesting new features. The easiest to see is the new controller with a touchscreen interface. The new controller has E-stop emergency stop, power and reset switches. It also has an SD card slot as well as USB and power connectors. The SD slot allows you to save the laser gcode file to an SD card and keep it locally on the laser. This allows you to run laser jobs in standalone mode. When you run the laser this way, there is no need to connect a computer to the laser. A software update is planned for December 2021 to allow connections via local WiFi, but it is not yet available at the time of publication. The second enhancement to the Atomstack A10 Pro is the new dual-beam laser head. The dual beams make this head a 10-11w total optical power head compared to the 5.5w heads I’ve reviewed in the past. 10-11w light output is achieved by combining 2 standard 5.5w laser diodes. This is done using mirrors. One laser beam is pointed straight down, while the other is positioned at 90 degrees or parallel to the work surface. Through the mirror, the two beams are combined. The pictures I’ve included in the photo gallery should help explain this better. Needless to say, 10-11w is better than 5.5w. It allows for faster cutting and engraving and offers a greater choice of materials. I was able to actually etch grade 5 titanium. Pretty impressive. Atomstack offers a kit that allows you to double the working area of your laser. The kit replaces some frame members and allows you to expand the machine to a 410x800mm work area for larger projects. There is also a rotation option if you need to engrave round objects.
SafetyThe manual also covers the very important security aspects and doesn’t repeat them enough. Although small, this is a laser that can cause serious damage. Read and follow all safety warnings. As a basic rule, don’t look at the laser at all, make sure what you’re cutting doesn’t emit toxic fumes (like PVC, ABS, epoxy, etc.), only use it in a well-ventilated space and don’t stare into the beam. Safety is your responsibility…you have been warned.
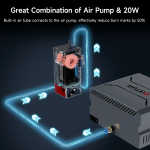
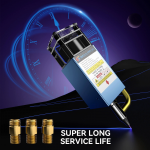
Smoke exhaustI set up a basic smoke extraction system with a 6″ inline fan, some 6″ ducting, and a 6″ blast door. I created a simple enclosure out of some 24×36 inch pieces of corrugated plastic. I am very happy with how it works. The fan is pulled out of the case and ventilated to the outside. The blast door is used to let fresh air in from the outside so that the fans can pull freely.
SoftwareI use Lightburn for all of these tests. It’s feature rich compared to LaserGRBL, but both will work. I love Lightburn because I can create almost anything in it. It’s great for cutting or creating on the fly, as it allows you to draw, type, zoom, and more directly within the program.
The machine is indeed a big step up from the A5 Pro. The A10 Pro has the same build quality, a new laser height adjustment knob, a new touchscreen controller, and you can expand its work area and use the rotator. The laser power is amazing for an LED based laser engraver/cutter. It does everything I’m used to doing, but faster than the Atomstack A5 Pro. For a $599 machine, the excellent results I’ve had with anodized and painted aluminum cards, super-dark markings on stainless steel, and actual etching of titanium are all amazing results. If you haven’t seen the images below, be sure to watch the YouTube video. As always, the link is below.
The LaserPecker 2 is a fun laser engraver in a small package!
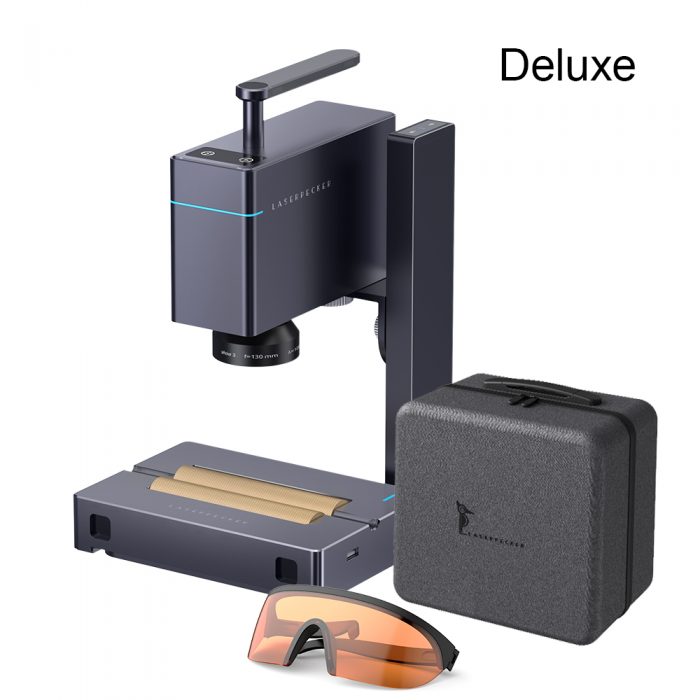
This is the first galvo laser engraver I’ve had the chance to review, so I’m ecstatic! I wish I could review their upcoming LaserPeck 3 machine. It is the same type as the galvo, but is designed for metal and plastic.The main unit and swivel unit are packaged in their own retail box. They all come in a sturdy little cardboard box. There was no damage to the case or product, and nothing was missing.Two Allen screws attach the bottom plate to the standoffs… and that’s it. Everything else that screws together uses very large thumbscrews.
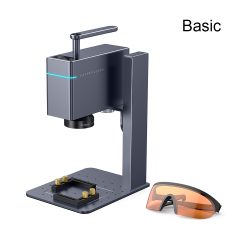
LaserPecker 2 has many great features. First, it’s very easy to set up. 5 watts of laser power is perfect for wood, paper, leather, fabric and more. The mobile app for controlling the LaserPecker 2 is easy to use and very intuitive. It allows you to create laser engraver jobs very quickly and easily. The application has all the basic required functions. You can use the built-in clip art library, import pictures, use the camera, create text, create barcodes and QR codes. You can tweak the sculpt settings if you want, but I found I mostly just stuck to the stock settings and got good results. The only exception is when carving corks. The base setup wanted the laser power at 30%, but I changed it to 50% for a better mark. In addition to the main laser unit, I also received the swivel attachment. Calling it a swivel attachment wouldn’t be fair, as it does so much more than that. You can use it not only as a standard rotary unit for round objects like cups, but also for moving longer materials under the laser in a so-called slab mode. I find that heavier and narrower materials work better in this mode. The last mode is the cart mode (my favorite). In this mode, the swivel is flipped upside down so the scroll wheel is on the bottom. The laser head is then attached to a special bracket, which is then attached to the bottom of the rotator. This turns it into a wheel laser, allowing the laser to travel through the material and make longer marks than standard 100x100mm or 4x4in marks. The included magnetic riser blocks clip into the square holes in the front of the swivel unit and act as support wheels to keep the unit from tipping over. IMHO this is a very creative solution. In trolley mode, you can engrave 100×1000-2000mm (4×39-78in). Very impressive to say the least. Some other notable features are the fan shrouds. Not only does it exhaust smoke from the engraving area, it adds extra eye protection and acts as a focusing tool. When mounted on a laser head, the bottom edge of the light shield is the focal point of the laser. If you are using the LaserPecker 2 without the hood attached, there is a focus rail on the stand that folds down, or you can use the included ruler to measure 110mm from the bottom of the laser head to set the focus. This stand looks…standard, but it’s not. It can be raised and lowered electrically using the 2 smooth touch buttons on the side of the stand. If the up or down buttons are touched, the stand will raise or lower the head by 1mm respectively. If you touch and hold (long press) the button, the head will move continuously until you touch the button again. The last feature I want to mention is probably the first one I noticed, and that is the build quality of the main unit and swivel. The fit and finish of every component including the cables and power supply is the best I’ve seen so far. Touch buttons, anodized aluminum, ports, fan grills, carrying handles, electronic lift stand, swivel mechanism, rubber feet, magnetic riser with ball bearing slides, each component has a quality and attention to detail that make it They are a joy to use. left a deep impression on me.
The manual also covers the very important security aspects and doesn’t repeat them enough. Although small, this is a laser that can cause serious damage. Read and follow all safety warnings. Wear safety glasses whenever possible and keep shields in place. As a basic rule, don’t look at the laser at all, make sure what you’re engraving doesn’t emit toxic fumes (such as PVC, ABS, epoxy, etc.), only use it in a well-ventilated space and don’t stare into the beam. Safety is your responsibility.
I set up a basic smoke extraction system with a 6″ inline fan, some 6″ ducting, and a 6″ blast door. I am very happy with how it works. A fan is drawn from the laser working area and ventilated to the outside. Another part of my shop uses open blast doors to let fresh air in from the outside (away from the exhaust) so the fans can pull freely.
The software used was the LaserPecker app from the IOS app store. I run all test jobs from my phone. A version of the LaserPecker app is expected to be available for Windows and Mac in late July 2022.
I’d love to see LaserPeacker 2 add something in a future release (if it’s up to me). The first one is at least a 10w laser power head. This will help the LaserPecker 2 work on metal and also help with cutting. I also wish the laser preview (which is awesome) uses a low power laser pointer type laser for the preview task rather than the actual engraving laser. This is more of a safety concern, as laser pointer lasers are generally low powered and not potentially hazardous to the eyes.
This machine is an absolute joy to use. It’s intuitive, well-designed and compact. You can tell a lot of thought went into its development, including all the unique features and usage modes. Although it has a smaller work area, it somewhat makes up for that when you use it in cart mode. It also has the smallest footprint. It’s a welcome change, most of the machines I’ve tested take up ten times the space in my shop. Laser preview is a great feature, and I hope we see more of it in the laser engraving machine space. All in all, I am very happy with the LaserPecker 2. It’s of excellent quality and a joy to use. If you haven’t seen the images below, be sure to watch the YouTube video. As always, the link is below.