China Vane Pump – Vane Pump Failure: Some Tips
The China Vane Pump says that if the hydraulic system is part of your operation, you will most likely need to troubleshoot and repair the vane pump or motor one day. While today’s products are rugged, reliable and efficient, they are still mechanical and often fail due to normal wear and tear, and more commonly abuse.
When the vane pump fails, there is almost always an approximate event – an overload, a leak or some condition that may be pointed to the cause of the fault.
These obvious, obvious causes of failure are usually just the last step in a process that lasts for months or years. The fact is that more than 80% of the failures in the vane pump and motor can be traced back to one cause because the hydraulic oil is dirty.
The first tip I want to provide is this – keep the liquid clean.
Your filtration plan is the first line of defense against all hydraulic components, not just vane pumps and motors. That’s right, you need to develop and implement a filtration plan to keep your liquid clean. The plan should include cleanliness goals for the system and application environment, as well as detailed procedures for maintaining them.
If 80% of hydraulic failures are caused by dirty fluids, fluid cleanliness should be as part of the system design as pumps, valves, actuators and bearings. Unfortunately, when some system designers choose filters, they appear to be just a catalog of filter manufacturers, regardless of the overall requirements of a particular system.
Proper selection and placement of pollution control devices in the system to achieve targeted cleanliness eliminates the root cause of hydraulic system failures of up to 80%. In addition, attention to system cleanliness ensures that users can use cost-effective pollution control methods to quickly restore filters and components by improving performance, extending component life, extending oil life, extending uptime and less cost. price. service.
The complexity of designing and maintaining an effective filtration system is beyond the scope of this article.
The first step in troubleshooting dirty fluids is to understand where the pollution originates. There are four basic sources:
Contaminated new oil
Built-in pollution
External pollution
Internally generated pollution.
Here are some basic procedures for dirty fluids.
Do not think that the new liquid is clean. Never think of hydraulic oils just because they are new and clean, and never install hydraulic fluids that are not filtered out immediately before they are placed in the equipment. Portable transfer vehicles with high-efficiency filters are very cheap insurance.
Even if it is new, clean the machine yourself: usually flush new or rebuilt machines to remove any contaminants introduced during the manufacturing process, but no matter how serious the machine manufacturer is, you still need to “run in” any no load applied. New or rebuilt equipment – actively filter liquids as you work.
Good housekeeping offers great benefits: most hydraulic systems are not suitable for use in clean room environments, so you need to pay special attention to removing environmental contaminants from the equipment. There are four main locations for dirt to access your system:
Reservoir respirator and vents
Access section
Shaft and cylinder seal
Any and all components that are open during maintenance.
What you can’t see is probably the worst: In fact, the most damaging contaminants in almost any system are tiny metal particles that fall off the pump’s internal components. If you can’t remove them quickly, one particle becomes two particles, two particles become four particles, four particles become eight particles, and soon your precision hydraulic components begin to self-destruct.
Troubleshooting
80% of hydraulic system problems can be traced directly to contaminated liquids. Therefore, it makes sense to begin to eliminate any system failure by learning to identify the damage caused by dirty fluids.
Marked or “matte” blades, grooved shaft seal diameters or “shredded” rings (Figure 3) are classic signs of dirty fluids. You know the drill bit: find the source of contamination and remove it before repairing the pump or motor, flushing the system and putting it back into operation. Then be more active on your filter.
Cavitation damage
The main cause of damage to components not related to dirty fluids is cavitation. This happens in two different ways, but the results are the same.
Cavitation is basically the process of forming bubbles in a fluid and then exploding. When the bubble bursts, it produces an extremely high temperature that is high enough to weaken or even melt the metal parts of the system. Repeating this process tens of millions of times results in severely eroded surface and non-functional components.
The first source of cavitation is the leakage of air into the fluid. If this continues, the result is the catastrophic damage seen in Figures 4 and 5. Typical reasons include:
Suction pipe allows intake
Shaft seal wear, allowing air to be drawn in
Reservoir problem
Low oil level
Reservoir entrance is too high
The reservoir is too small
Unsuitable liquid.
The second form of cavitation comes from applying a high force to the fluid as it passes through the system. In this case, the fluid is actually torn open to form a void with a high internal vacuum. As shown in Figure 6, the implosion of these voids can be extremely destructive. Typical causes of damage include:
The entrance speed is too fast
Poor reservoir and / or system design
Inlet filter and filter blockage
Limit fluid flow
High water content of oil
Run a pump that exceeds the recommended speed
Erosion damage
Erosion damage looks a lot like cavitation damage, but erosion damage occurs when high velocity oil flows push the contaminant particles against the surface. Conceptually, it can be thought of as a form of sandblasting using very small particles. Erosion damage typically occurs at metering edges or critical surfaces and is often less severe and extensive than cavitation damage. Actively applied filtration plans are the best way to prevent erosion damage, although the use of fluids above the recommended ISO level can cause erosion.
Catastrophic damage
Catastrophic failures are easy to spot because they usually destroy something. Typical causes include overpressure, air lock, misalignment, incorrect modifications, component misuse, and incorrect assembly procedures.
But don’t forget that this is a disaster
Hic failure may be the end result of long-term problems that can be traced back to dirty fluids. Your filtering plan is also the best protection against these failures.
The key to avoiding catastrophic failure is the same as avoiding all other failures that may fall into the hydraulic system. Keep the liquid clean. In doing so, you will find that hydraulic troubleshooting and repair takes up a small fraction of your workday.
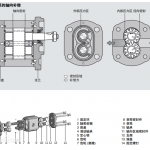
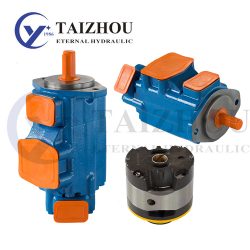
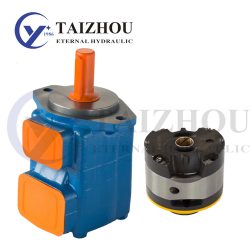
Overhaul a VANE pump
The vane pump can be easily accessed without any special tools on site. The process first disconnects the power supply and removes the bolts that secure the cover to the pump casing. Be sure to mark the pump body and cover so that they can be reassembled in the correct direction.
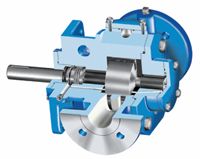
Slide the cartridge out of the casing and place it on the workbench.
Draw a line on the outer surface of the cartridge kit to provide a reference for the part during assembly.
Place the cartridge on a flat surface (outlet support plate down) and remove the two socket head cap screws.
Slide the inlet support plate and seal pack out of the cartridge.
With the outlet support plate facing up, the outlet support plate and seal pack are slid out of the box; the flexible side panels are not allowed to slide with the support plate. Move the flexible side panels away from the center enough to lift and leave without slipping.
Remove the cam ring from the rotor and blade. Find the arrow stamped to the periphery of the rotor. Remove the blades and inserts in order from the arrow. Keep them for inspection.
Do not remove the box locating pins from the inlet support plate unless they are damaged. The pin is drive type and difficult to disassemble.
component
Reverse the disassembly sequence and pay attention to the following points.
Apply all parts except the seal and the support ring with clean hydraulic oil. Use a small amount of Vaseline to hold the O-ring in place.
All sharp edges on the new cartridge kit should be stoned before installation.
All components of the O.D. cassette kit must be aligned with each other or the cover cannot be installed.
Check if the rotor is joined by inserting the index finger into the shaft opening of the inlet support plate. Hold the cartridge assembly in the horizontal axis position and lift the rotor with your fingers. The rotor should move freely back and forth inside the box. If the rotor is bound, open the kit, clean and polish all possible binding areas, then reassemble using the procedure above.
https://www.xjetl.com