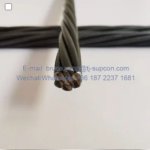
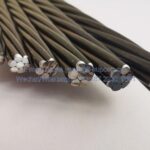
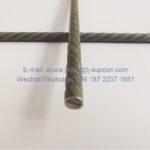
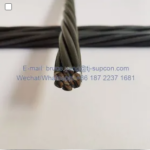
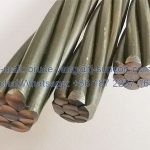
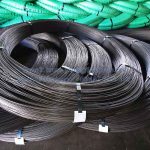
15.24mm PC Strand Applications in Bridge Construction
15.24mm PC Strand Applications in Bridge Construction
Introduction
Bridge construction demands materials that can withstand decades of cyclic loading, environmental exposure, and extreme stress. The 15.24mm PC strand has become a standard choice for post-tensioned and pre-tensioned concrete bridges worldwide, but specifying the right strand grade, coating, and anchoring system is not straightforward. Many projects suffer from premature corrosion, strand relaxation, or anchor slip because the wrong product was selected for the specific bridge type and environment.
This guide walks you through the technical criteria for selecting and applying 15.24mm PC strand in bridge construction. You will learn how to match strand properties to design loads, evaluate bonded versus unbonded systems, and verify compliance with international standards. The focus is on practical, data-backed decisions that reduce risk and extend bridge service life.
Key Takeaways
- 15.24mm PC strand is the most common diameter for bridge tendons, with typical ultimate tensile strength ranging from 1860 MPa to 1960 MPa.
- Bonded strand systems provide superior corrosion protection and are preferred for segmental and cable-stayed bridges.
- Unbonded strand systems allow for future re-tensioning and are used in box girder and continuous span bridges.
- Proper anchorage selection and grouting procedures are critical to achieving design prestress levels.
- Regular quality testing of strand relaxation, elongation, and bond performance prevents field failures.
What You Need Before Starting
Before specifying 15.24mm PC strand for a bridge project, gather the following:
- Design drawings and load calculations — including maximum tendon force, eccentricity, and loss estimates.
- Environmental classification — exposure class (e.g., C1, C2, C3, C4 per EN 206) determines corrosion protection requirements.
- Applicable standards — typically ASTM A416, EN 10138, or ISO 6934, depending on project location.
- Tendon layout and duct geometry — determines strand count per duct and required jacking clearance.
- Quality assurance plan — including sampling frequency for tensile tests, relaxation tests, and bond tests.
If you are sourcing from a manufacturer, verify that their production lines can deliver consistent mechanical properties. For example, a facility with PC Wire Spiral Ribbed production capability can also produce strand with controlled surface geometry for improved bond.
Step 1 — Select the Correct Strand Grade and Diameter
What to Do
- Confirm the nominal diameter: 15.24 mm (0.6 inch) is the standard for most bridge tendons. Verify that the strand meets the dimensional tolerances in ASTM A416 or EN 10138.
- Choose the strength grade: The most common grades are 1860 MPa (270 ksi) and 1960 MPa (284 ksi). For long-span bridges requiring higher prestress, 1960 MPa strand reduces the number of tendons needed.
- Check relaxation class: Low-relaxation (Class 2 per EN 10138) strand is mandatory for bridge applications. Relaxation loss after 1000 hours at 20°C should not exceed 2.5% of initial load.
Why This Matters
Using the wrong grade can lead to excessive creep or insufficient prestress. A 15.24 mm strand at 1860 MPa has a nominal breaking load of approximately 260 kN. If your design requires 300 kN per tendon, you need a higher grade or a larger diameter. Low-relaxation strand ensures that the prestress force remains stable over the bridge’s service life, which is typically 100 years for major structures.
Common Mistakes to Avoid
- Assuming all 15.24 mm strand is the same: Different manufacturers use different wire drawing processes. Always request mill certificates showing actual tensile strength, yield strength, and elongation at break.
- Ignoring relaxation data: Some suppliers quote only ultimate strength. Demand relaxation test results per ISO 15630-3 or ASTM E328.
- Overlooking surface condition: For bonded applications, the strand surface must be free of oil, grease, or loose rust. A clean, slightly oxidized surface improves bond with grout.
Step 2 — Choose Between Bonded and Unbonded Systems
What to Do
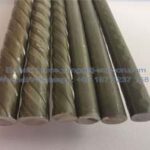
- For bonded systems: Specify PC Wire Indented or spiral-ribbed strand to enhance mechanical interlock with cement grout. Bonded strand is grouted after tensioning, providing full corrosion protection and load transfer along the entire tendon length.
- For unbonded systems: Use greased and sheathed strand (unbonded PC strand). The strand is encased in a plastic sheath filled with corrosion-inhibiting grease. Unbonded tendons allow for future re-tensioning or replacement.
- Evaluate the bridge type:
– Segmental bridges: Bonded systems are standard because they provide redundancy — if one strand fails, adjacent strands share the load. – Cable-stayed bridges: Bonded strand in the stay cables prevents fretting fatigue at anchorages. – Box girder bridges: Unbonded systems are common for internal tendons, allowing for easier inspection and maintenance.
Why This Matters
Bonded systems offer superior long-term durability. According to a 2019 study by the International Federation for Structural Concrete (fib), bonded tendons in properly grouted ducts have a failure rate below 0.01% over 50 years. Unbonded systems, while easier to maintain, rely entirely on the integrity of the sheath and grease. If the sheath is damaged during installation, corrosion can initiate rapidly.
Common Mistakes to Avoid
- Specifying bonded strand for a bridge with high fatigue loading without verifying bond performance: The strand-to-grout bond must be tested per EN 10138-3 or ASTM A981. A minimum bond strength of 10 MPa is typical.
- Using bonded strand in an unbonded application: The surface ribs or indentations can damage the plastic sheath during stressing.
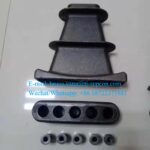
- Neglecting anchorage compatibility: Bonded and unbonded systems require different anchor types. For bonded systems, use Prestressed Anchorages designed for grouted tendons.
Step 3 — Verify Mechanical Properties Through Testing
What to Do
- Request mill certificates for each production lot. Key data points include:
– Ultimate tensile strength (MPa) – Yield strength at 1% extension (MPa) – Elongation at break (minimum 3.5% per ASTM A416) – Modulus of elasticity (typically 195–205 GPa)
- Perform relaxation tests on a sample from each heat. The test should run for 1000 hours at 20°C and 70% of ultimate load. Relaxation loss should not exceed 2.5%.
- Conduct bond tests if using bonded strand. Use the pullout test method per EN 10138-3. A bond stress of at least 8 MPa after 28 days is acceptable for most bridge designs.
Why This Matters
Field failures often trace back to strand that met the minimum tensile strength but had excessive relaxation or poor bond. For example, a 2015 investigation of a post-tensioned bridge in Germany found that strand relaxation was 4.2% — nearly double the allowable limit — causing a 15% loss of prestress over 10 years. Regular testing catches these issues before the strand is installed.
Common Mistakes to Avoid
- Accepting certificates without independent verification: Always have a third-party lab test at least one sample per 50 tons of strand.
- Ignoring elongation requirements: Strand with elongation below 3.5% may be brittle and prone to sudden failure under impact or overload.
- Not testing bond after grouting: The grout mix design affects bond strength. Test bond on a mock-up tendon before full-scale production.
Step 4 — Plan for Proper Handling and Installation
What to Do
- Store strand off the ground on wooden or rubber pads to prevent moisture contact. Cover with a breathable tarp — never use plastic sheeting, which traps condensation.
- Cut strand with an abrasive saw or hydraulic cutter. Never use a torch — heat can alter the metallurgical properties and reduce strength.
- During tensioning, monitor elongation and jack pressure simultaneously. The force-elongation curve should be linear. A sudden change indicates strand slip or anchorage failure.
- For bonded systems, grout within 7 days of tensioning. Use a neat cement grout with a water-cement ratio between 0.35 and 0.45. Add a plasticizer if needed to achieve a flow cone time of 15–25 seconds.
Why This Matters
Improper handling is the leading cause of strand damage before installation. A 2020 survey by the American Segmental Bridge Institute found that 30% of post-tensioning defects originated from storage or handling errors. Grouting delays allow moisture to enter the duct, leading to corrosion before the grout is placed.
Common Mistakes to Avoid
- Allowing strand to kink or bend sharply: The minimum bending radius for 15.24 mm strand is 1.5 meters. Tighter bends cause localized stress concentrations.
- Over-tensioning to compensate for friction losses: This can exceed the strand’s yield point. Instead, use a friction-reducing lubricant on the duct.
- Grouting in cold weather without heating the water: Grout temperature below 5°C slows hydration and reduces strength. Use warm water (20–30°C) and insulate the ducts.
Step 5 — Inspect and Document the Completed Tendon
What to Do
- After grouting, perform an endoscopy inspection of the duct to verify full grout fill. Voids larger than 5% of the duct cross-section must be repaired.
- Measure the final prestress force using a lift-off test at the anchorage. The force should be within 5% of the design value.
- Document all test results, mill certificates, and installation records in a project-specific quality file. This file is essential for future inspections and maintenance.
Why This Matters
Bridges are designed for a 100-year service life. Without proper documentation, future engineers cannot assess the condition of the prestressing system. A 2018 study by the Federal Highway Administration (FHWA) found that bridges with complete post-tensioning records had 40% fewer unexpected repairs than those without.
Common Mistakes to Avoid
- Skipping the endoscopy inspection: Voids in grout are invisible from the outside. They can lead to localized corrosion and strand failure within 10–15 years.
- Assuming all anchorages are identical: Each anchorage type has a specific wedge seating loss. Verify that the wedges are fully seated and the strand tail is cut to the correct length (typically 75–100 mm beyond the wedge).
- Not sealing the anchorages after inspection: Exposed wedges and strand tails must be coated with a corrosion-inhibiting compound and covered with a protective cap.
Pro Tips for Success
- Specify strand with a controlled surface profile for bonded applications. PC Wire Plain Surface strand can be used in unbonded systems, but for bonded systems, indented or spiral-ribbed strand improves bond strength by 20–30%.
- Use a relaxation test frequency of one per 100 tons for critical bridges. This is stricter than the industry norm of one per 200 tons but provides better quality assurance.
- Insist on a factory audit before placing a large order. Verify that the manufacturer’s production lines are calibrated and that their laboratory can perform all required tests in-house.
- Consider using 1960 MPa strand for long-span bridges to reduce the number of tendons and simplify the anchorage layout. The cost premium is typically 5–10%, but the savings in labor and materials can exceed 15%.
Frequently Asked Questions
What is the typical breaking load of a 15.24 mm PC strand?
A 15.24 mm strand with a tensile strength of 1860 MPa has a nominal breaking load of approximately 260 kN. For 1960 MPa grade, the breaking load is about 275 kN. Actual values depend on the manufacturer’s wire drawing process and should be verified through mill certificates.
Can I use the same strand for bonded and unbonded applications?
Not recommended. Bonded strand typically has a surface profile (indented or spiral-ribbed) to improve mechanical interlock with grout. Unbonded strand has a smooth surface and is greased and sheathed. Using bonded strand in an unbonded system can damage the sheath, while using unbonded strand in a bonded system reduces bond strength.
How long can strand be stored before use?
Strand can be stored for up to 12 months in a dry, covered environment. After 12 months, the surface may develop heavy rust that reduces bond strength. If strand shows pitting or flaking rust, it should be rejected. Light surface oxidation is acceptable and can improve bond with grout.
What is the minimum grout strength required for bonded tendons?
The minimum compressive strength of grout at 28 days is typically 30 MPa (ASTM C109) or 35 MPa (EN 196-1). The grout must also have a maximum bleed of 0.5% and a flow cone time between 15 and 25 seconds. Always test the grout mix before full-scale production.
Conclusion
Specifying 15.24mm PC strand for bridge construction requires careful evaluation of strand grade, surface profile, bonding system, and quality assurance procedures. By following the five steps outlined in this guide — selecting the correct grade, choosing between bonded and unbonded systems, verifying mechanical properties, planning proper handling and installation, and inspecting the completed tendon — you can ensure that your bridge meets its design service life of 100 years.
The key is to treat strand selection as an engineering decision, not a commodity purchase. Demand mill certificates, perform independent testing, and document every step. When you work with a manufacturer that has dedicated production lines and in-house laboratories, you gain confidence that each strand meets the required standards. Start your next bridge project by specifying 15.24mm PC strand with the right grade, surface profile, and anchoring system — and verify every step along the way.